Named Ranges
a very nice feature of Excel is the ability to create named ranges so that cell references or even values can be given a more meaningful definition.
Creating a Named Range
Example 2 - create a named range for a value
Creating a Named Range
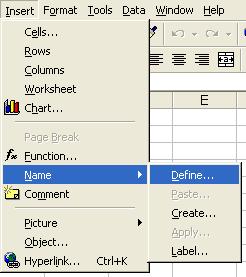
- To create a named range simply go to the Insert Menu - > Name -> Define
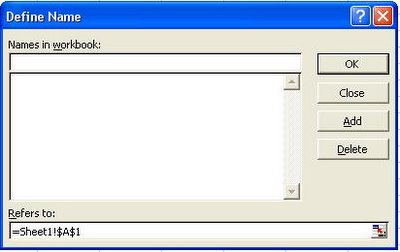
- This will bring up the Define Name dialog
- Enter a name in the Names in workbook textbox
- In the refers to textbox you can enter a the following pieces of information:
- Ranges ($A$1:$A$5)
- Values (10% - could be used for the named range GST)
- Click the 'Add' button and then 'OK'
- Insert Menu - > Name -> Define
- This will bring up the Define Name dialog
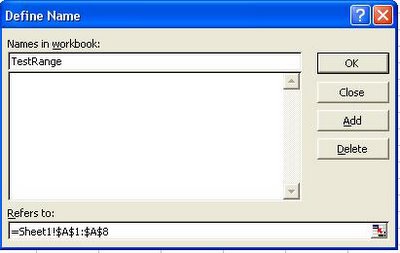
- Enter TestRange in the Names in workbook textbox
- In the refers to textbox, select range A1 to A8 of Sheet 1
- You can now use this in a formula for example, =Sum(TestRange), will total the values in cells A1:A8 of Sheet1


Example 2 - create a named range for a value

0 Comments:
Post a Comment
<< Home